Creating Graffiti Art in Photoshop

Today’s essential question: How can I use Adobe Photoshop to make my oil pastel artwork look like it was spray painted on a wall?

Part 1: Download a wall image:

  • Click on an image below
  • In the bottom right corner, click “View Full Size.”
  • Once the full size image appears, right click it, and select “Save Image”

You may choose any of these walls. Please do not try to find your own on the internet – it will likely not work for the purpose of this project:

Part 2: Add Graffiti Art to our Wall in Photoshop:

Organizing your Files

  1. Create a new folder in your 890 number (Right click -> New -> Folder)
  2. Name the folder “Graffiti Wall”
  3. Move the following images into this folder: your wall image, your photograph of your artwork, and any other images you would like to add

Removing the background from the Graffiti Art

  1. Open Adobe Photoshop
  2. Open the Wall and artwork images (File -> Open -> locate and select these images)
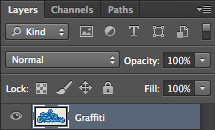
  3. Double-click the “background” layer on your artwork and rename it “Graffiti”
    layers_graffiti.png
  4. Select the direct selection tool from the toolbar on the left side of the screen direct_selection
  5. Painting over the background area so it selects the background.
    You can make the selection tool larger to speed up the process by pressing the right bracket key right_bracket_small
    You can make the selection tool smaller to get more control over what is selected by pressing the left bracket key left_bracket_small
  6. Continue until you have selected the entire background, including any background spaces between letters
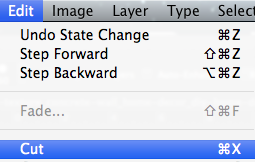
    art_bg_selected
  7. Go to Edit -> Cut
    edit_cut
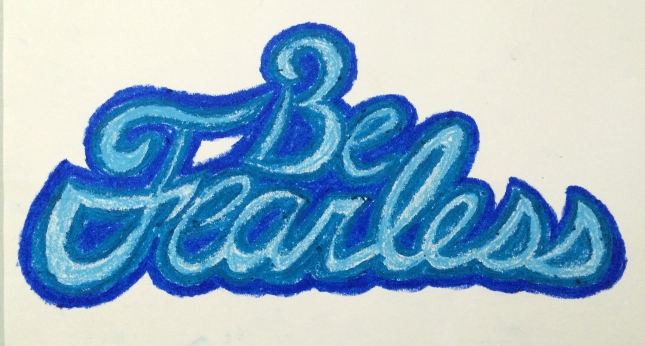
  8. Your artwork should now look like this:
    art_cut_bg
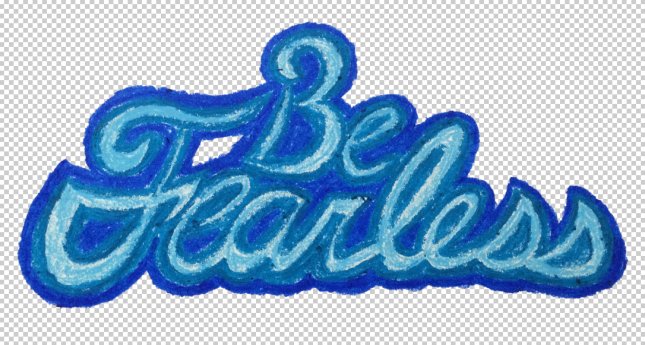
  9. Save the image as a Photoshop file. (File -> Save)

Combining the Graffiti and Wall Images

  1. Click and drag the tab at the top of the screen to separate the images
  2. Click on the move tool in the tools panel on the right side of the screen move
  3. Click and drag the “Graffiti no bg” layer into the wall image file
  4. Select the free transform tool. Edit -> Transform -> Free Transform
    edit_free_transform
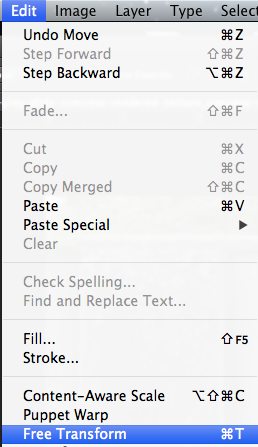
  5. Hold down on the shift key and scale your image from the corner.
    free_transform
    Press enter when you are done.

Using Gaussian Blur to Create a Spray Paint Effect

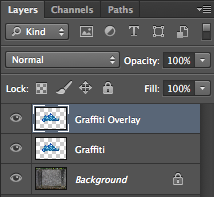
  1. Duplicate your graffiti layer. Layer -> Duplicate Layer. Name the layer “Graffiti Overlay.”
    graffiti overlay palette.png
  2. Add a slight Gaussian blur to the Graffiti Overlay layer. Filter -> Blur -> Gaussian Blur. Adjust the slider so it is somewhere between 4.0 and 7.0.
    gaussian_blur_window.png
  3. Click on the original “Graffiti” layer in the layers palette on the lower right side of the screen. It will turn blue.
    graffiti_layers_palette.png
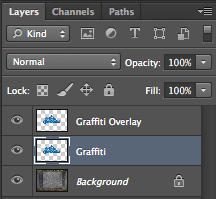
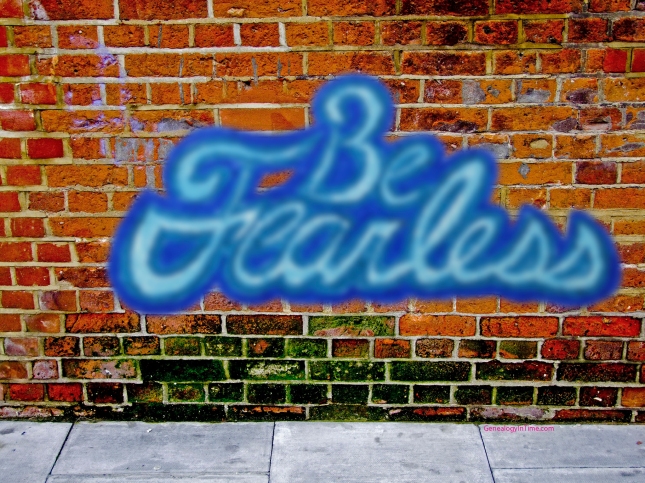
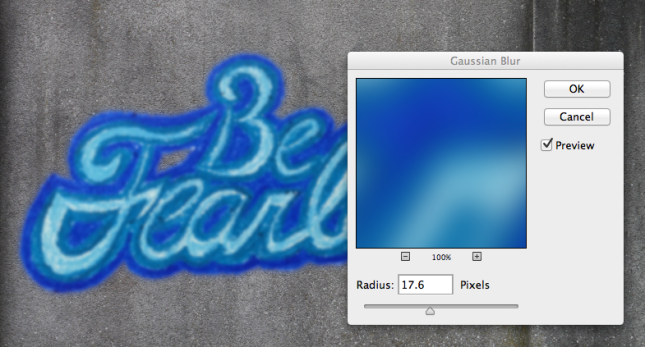
    Then go to Filter -> Blur -> Gaussian Blur. Adjust the slider so it is somewhere between 10.0 and 20.0. This should blur the edges of the artwork without blurring the middle of it, creating a more realistic spray paint effect.
    guassian_blur2.png
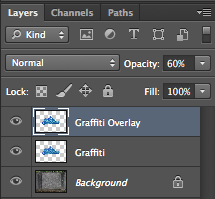
  4. Now we will change the opacity of our graffiti layers to allow some of the wall texture to show through. In the layers palette on the lower right side of the screen, click the “Graffiti Overlay” layer. Change the opacity to 60%.
    graffiti_overlay_60
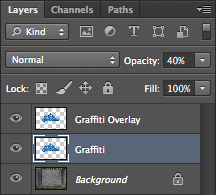
    Then click on the “Graffiti” layer. Change the opacity to 40%.
    graffiti_40
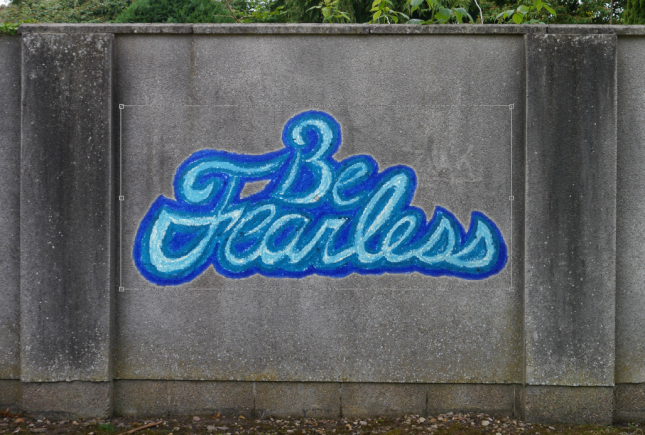
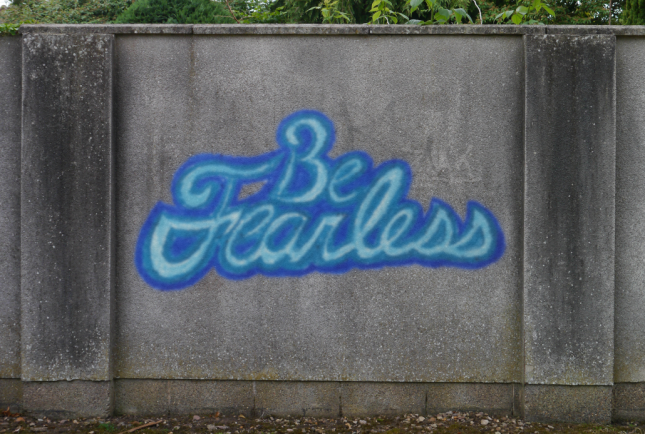
    Now your graffiti wall should look something like this:
    graffiti_wall_opacity.png

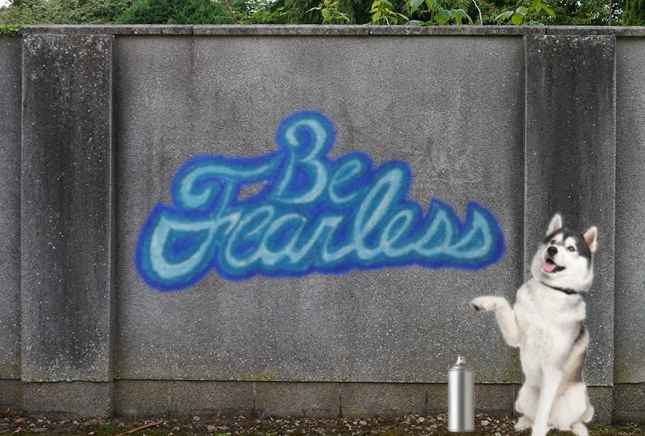
Add other images to your file

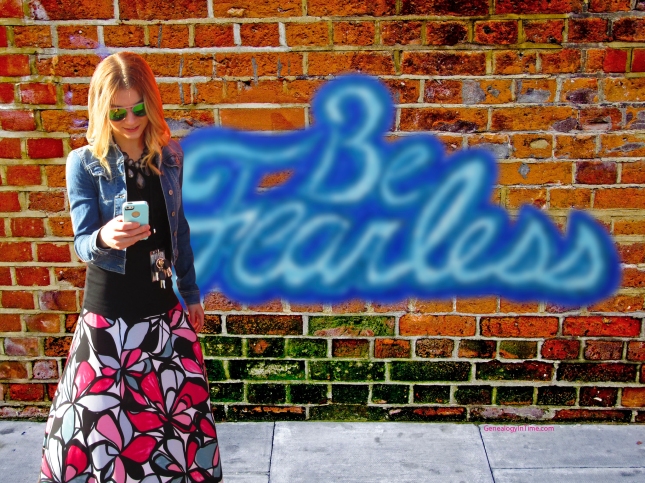
  1. Drag other images, as you see fit, into your Photoshop file.
  2. Use the steps listed above to remove the backgrounds from these images and scale them to the appropriate size.
    finished_Exemplar.jpg

Save your image

  1. Save your image as a Photoshop file (File -> Save) Name your image “YourName_Graffiti.psd)
  2. Save your image as a PNG file (File -> Save as) YourName_Graffiti.png)
  3. Upload the Photoshop file to your Google Drive Account
  4. Post your PNG file to your blog

Remember to save your file as both a Photoshop (.PSD) and a .PNG file. You will not be able to post a Photoshop file to your blog, and you will not be able to edit a PNG file later on.

Today we will:

  • Combine our oil pastel artwork and a wall of our choice in Adobe Photoshop
  • Use a variety of tools to remove the background from our artwork
  • Apply the Gaussian blur to make our art work appear to be spray painted
  • Create a new blog post with an image of the work we did today (it is ok to post an in progress image if you did not finish today)

Who is Banksy?

Today’s essential question: What value do graffiti artists, such as Shawn Dunwoody and Banksy, bring to their communities?

Banksy  is an anonymous England-based graffiti artist, political activist and film director of unverified identity. Banksy’s satirical street art and subversive epigrams combine dark humour with graffiti executed in a distinctive stenciling technique.

Some of Banksy’s artwork

banksy_clipstone_crop

street_art_or_more_specifically_banksy_desktop_1280x800_hd-wallpaper-1091976

16-girl-searching-soldier

banksy-maid-canvas

banksy_change

graffiti-banksy-street-art-hd-wallpaper

banksy_street_art_desktop_1920x1200_hd-wallpaper-1091975

Some questions to think about:

  • If you were trying to become a famous artist, would you keep your true identity visible or would you hide it?
  • Banksy states, “If graffiti changed anything, it would be illegal.” What do you think?
  • Explain the difference between good and bad graffiti.
  • Does art always need to convey a message? Is art stronger if it does?

Today we will:

  • View examples of Banksy’s artwork
  • Discuss the value graffiti artists bring to their communities and contemplate art as a means for change
  • Continue working on our final graffiti designs. If you finish, tape your project to a wall at eye level, and photograph it straight on with no flash. Transfer the photo onto your computer, upload it to your Google Drive (as a back up), and post it to your class blog.

Oil Pastel Practice

Today’s essential question: How can I blend oil pastels to create a spray paint graffiti effect?

Today we will complete an oil pastel sketchbook assignment. You will blend a variety of colors, which should help you determine which colors you may want to use in your final piece. You will also see how it is difficult to get fine details with oil pastel, which is why you should work large and keep your design simple!

Here is an example of the completed sketchbook assignment:
oil_pastel_handout.jpg

Here is an example of how I used oil pastels to draw graffiti lettering:
oil_pastel_graffiti.jpg

And here is the same image after I manipulated it in Photoshop to make it look like it was spray painted:
graffiti_lettering_wall.jpg

Today we will:

  • Complete the oil pastel sketchbook assignment
  • Finish our concept sketches
  • Create a new blog post with the following:
    • A photo of our completed oil pastel sketchbook assignment
    • The answers to the following questions
      • What did you find easy about working with oil pastel?
      • What did you find difficult?
      • How has the oil pastel sketchbook assignment affected your plan for the graffiti project?
    • A photo of our concept sketch
    • A few sentences describing our project concept. Elyse has an excellent example of what I am looking for.

New Project: Graffiti Personal Statements

Essential Question:  How can I use graffiti style art to communicate a personal statement to the community?

For our next project, we will use oil pastels and Adobe Photoshop to create a personal statement in the style of Shawn Dunwoody.

Featured Artist: Shawn Dunwoody

According to his biography on Geneseo’s Hip  Hop Symposium, “As a multi-disciplinary Artist, Shawn Dunwoody. Dunwoody has established cutting edge and creative designs in various forms. With a “stay creative” attitude Dunwoody aims to integrate people’s needs, the possibilities of technology, and the genius of great experiences. Dunwoody asserts that creativity inspires and plays on one’s curiosity which makes people want to hear, learn, and engage more.”

Here are some examples of Shawn Dunwoody’s community artwork. These murals can be found all over Rochester:

Interested in working with Shawn Dunwoody and have an idea for a concept involving Black Lives Matter? Consider entering this contest by February 17.

Project Overview

In this project, we will use oil pastels and Adobe Photoshop to create a personal statement. This can be accomplished one of two ways:

  • use graffiti lettering to design a quote that is meaningful to you
  • design a symbol or image that represents an issue that is important to you (Black Lives Matter, LGBTQ rights, sanctuary cities for refugees, gender equality, etc)

We will then photograph the artwork, and use Photoshop to make it look like a mural on a wall.

Here is an example of a project that meets the requirements:

graffiti_brick_wall_exemplar.jpg

Project Requirements:

  • Artwork is a minimum of 9×12″ @ 300 DPI
  • Minimum of three images merged in Adobe Photoshop so they create a realistic scene
    • wall picked from one of the options provided
    • original artwork (quote or symbol) created with oil pastel to represent a concept or issue that is important to you
    • third image added in Adobe Photoshop (can be an image you photographed yourself, or one you downloaded from the internet, but no copyrighted characters)
  • High Quality Craftsmanship
    • No pixelation
    • Background from oil pastel artwork cleanly removed
    • Images Photographed from appropriate angels
    • Realistic scale, proportion, and camera angles
  • Final Blog post includes 150 word Artist Statement about the meaning of the project

We will have 5 classes to complete this project:

  • Day 1: Brainstorming and oil pastel practice
  • Days 2-4: Work on oil pastel statement or image. Photograph finished image and post to blog.
  • Days 4-5: Use photoshop to make oil pastel artwork appear to be on wall. Add image into foreground. Write artist statement describing the meaning behind the artwork.

Today we will:

  • Look at examples of Shawn Dunwoody’s community artwork
  • Brainstorm potential imagery or quotes for our oil pastel artwork
  • practice using oil pastels
  • create a new blog post with the following:
    • a photo of our concept sketch
    • a few sentences describing our concept


Mini Lessons: Digital Collage in Photoshop

Today’s essential question: How can I create a digital collage in Adobe Photoshop?

If you feel like you understand Photoshop well, consider becoming a student leader and help teach your classmates how to do the mini lessons. (Notice that I said teach, not do their projects for them!)

Today we will complete a series of Photoshop mini lessons. These tutorials will teach us how to combine multiple images into one Photoshop file, how to use the transform tool to scale and rotate an object, and how to use layers to make an object look like it is in front of parts of the scene but behind other parts of the scene. We will complete both the kitten dress up and kitten in a box tutorials, save a Photoshop version of our file and a png of each tutorial to our username, and post the PNG to our blogs.

You must create a new blog post that contains the work you did today in order to receive participation points.

Links to the resources we will use today:

Kitten in a Box (teaches us how to make an object look like it is inside a container)

cat_in_box_starter

Kitten in box tutorial starter file

Completed cat in box tutorial

Completed kitten in box tutorial

  • Click here to view the step-by-step instructions for the kitten in a box tutorial. (If you do not have this file open and cannot tell me what step you need help with, I will not help you.)
  • Click here to download the kitten in a box tutorial starter file.
  • If you have time, personalize it by adding other accessories, and perhaps a background that you have downloaded from the internet. You can even switch up the animal in the box if you’re not a cat person. Here are some examples created by Media students:

Kitten Dress Up Tutorial (teaches us how to combine multiple images into one Photoshop file, and how to use the transform tool to scale and rotate objects)

Completed kitten dress up tutorial

Completed kitten dress up tutorial

  • Click here to view the step-by-step-instructions for the kitten dress up Photoshop tutorial. (If you do not have this file open and cannot tell me what step you need help with, I will not help you.)
  • Click here to download the kitten dress up Photoshop file.
  • If you have time, personalize it by adding other accessories, and perhaps a background that you have downloaded from the internet. Here are some examples created by 9th grade students:

Today we will:

  • Complete the kitten in a box tutorial. Save your file to your username as both a photoshop (.psd) file and a .png file.
  • Complete the kitten dress up tutorial. Try to personalize it by adding other accessories, and perhaps a background that you have downloaded from the internet. Save your file to your username as both a photoshop (.psd) file and a .png file.
  • Create and publish a new blog post with the following:
    • a png of your completed kitten in a box image (if you got that far)
    • a png of your completed kitten dress up image
    • a paragraph describing how you create each image. Include any challenges you faced, and how you worked through those challenges.