Today’s essential question: How can I create a triangular mesh to capture value changes on my self-portrait in Illustrator?
Value is an Element of Design.

Value works on a scale:

What to Do
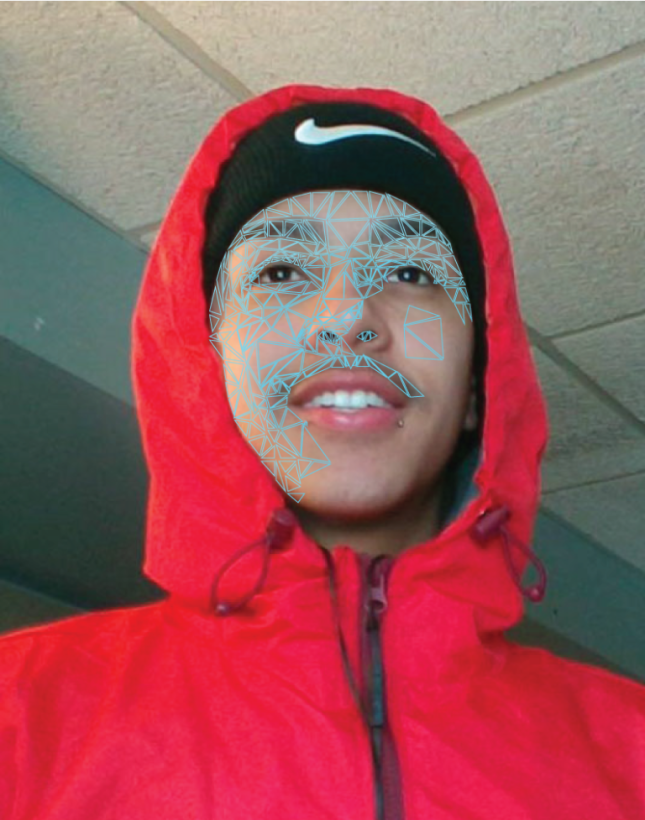
To create the low-poly effect, you will draw triangles over your reference photo to show the changes in value, as in the example below:
What NOT to Do:
Do NOT draw triangles that cover multiple values, such as the example below:

What is wrong with where these triangles are placed?

The triangle on the nose covers too many value changes.
The triangles on the cheek are too close. Some are over lapping.

These triangles are randomly spaced.
They will leave too many gaps and it will be difficult to fix later.

One of the triangles is open. They are randomly spaced.
Some of them cover more than one value.
How to Create Your Low-Poly Self Portrait
Part 1: Set Up your File in Illustrator
- Create a new file in Illustrator (File -> New Print Document)
- Set the dimensions to 11×14 inches
- Place your reference photo in the Document (File -> Place)
- Scale the reference photo so it fits within the edges of the document
- Lock your reference layer
- Save your file as a PDF
Part 2: Create a triangular mesh
- Create a new layer

- In the bottom left corner, set your fill options to “outline only,” and change the outline color to something bright that will contrast with your skin tone.

- Select the pen tool.

- Use the pen tool to draw triangles over the entire portrait. Each triangle should represent a shift in value.

Save your file as both a PDF and PNG and upload your progress to your blog.
Today we will:
- Begin creating our projects in Illustrator
- Upload our reference photo and PDF project file to our Google Drive accounts
- Publish a new blog post with the followig:
- a PDF of our progress
- a PNG of our progress
- a few sentences describing what was easy and what was difficult