Emoji Series: Final Blog Post

writing_emojiToday and next class we will finish creating our Emojis. We will publish a final blog post with the following:

  • A PDF of our emojis as they were traced in Illustrator (this will show up as a link on your blog)
  • A PNG of your emojis (this will show up as an image and allow people to see your final design without clicking on the link). How to save a PNG directly from Illustrator: File -> Save for Web and Devices -> PNG-24
  • An Artist Statement written in paragraph form about your emoji set that is a minimum of 150 words.

Artist Statement Guiding Questions

You can use these questions to outline your Artist Statement, but make sure you turn it into paragraph form.

  • Describe your artwork
    • What is the theme of your emojis?
    • Describe your emojis. How have you created unity throughout the set?
  • What is the big idea behind your artwork?
    • Who or what inspired your emojis?
    • Who is the target audience for your emojis? Why do you think they will use your emojis?
    • How do you want people to feel when they view your emojis?
  • How did you create your art?
    • Describe the process or steps you took to create your emojis.
  • Overall thoughts
    • What did you learn from this emoji design unit?
    • Is the final collection of emojis what you imagined? How so?
    • What did you do well? What could you have done better?

Today we will:

  • Finish creating our Emojis.
  • Publish a final blog post with the following:
    • a PDF of our emojis as they were traced in Illustrator (this will show up as a link on your blog)
    • a PNG of your emojis (this will show up as an image and allow people to see your final design without clicking on the link)
    • an artist statement about your emoji set written in paragraph form that is a minimum of 150 words

Professional Emoji Design

Today’s essential question: How does this project relate to real-world emojis and potential art careers?

unicodemoji

Why do the same emojis look different on different devices? Learn the answer to this and more in the articles below!

Today we will continue working on our emojis. If you would like a break, read some of the articles below. The describe how companies such as Apple and Twitter create new emojis, discuss the lack of diversity in emoji design, and even profile some big-name emoji artists.

Emoji Design Guide

Ever notice that certain sets of emojis have a distinctive style? Do you wonder what rules emoji designers need to follow, and how much creative freedom they get? Generally, emoji aesthetic is left to the designer’s discretion as long as they follow certain fundamental emoji design principles:

  • Maintain the industry standard shape of the emoji
  • Characters and things should maintain the same direction/orientation (a change of direction can change the meaning)
  • Stay neutral in terms of race, ethnicity and gender
  • Square aspect ratio

Read more about the process from UX Planet.

Meet the Designers Behind 6 Popular Emoji Sets

HOW Magazine profiled six emoji designers. Read this article to learn more about their creative process, inspiration, and the story behind some of your favorite emojis.

Unicode Consortium: The Organization that Regulates Emojis

Who decides what becomes an emoji? Why is there still such a lack on diversity in emojis? TheNextWeb explains how the Unicode Consortium created a global standard for emojis, and how new emojis are created. In short, Unicode assesses emoji proposals against a series of selection criteria:

  1. Frequency of use: the more likely that the emoji is to be used the more likely it is to be released.
  2. Multiple usages: the more meanings an emoji could be used to communicate the more likely it is to be released.
  3. Image distinctiveness: which is necessary to avoid confusion.
  4. Frequently requested: many people have previously, or are currently, calling for that emoji to be available.

Learn more by reading the full article.

Today we will:

  • Read about contemporary issues relating to emoji design in the corporate art world
  • Continue designing our emojis in Adobe Illustrator
  • Publish a new blog post with the PDF of today’s work


Breaking our Emojis into Simple Shapes

Today’s essential question: How can I break each emoji into simpler shapes to make it easier to trace?

The key to efficiently vectoring our emojis in Illustrator is to break each emoji into simple shapes, trace each shape separately, and combine these shapes to create the emoji. I have illustrated a few examples below:

Strawberry Concept Sketch

strawberry_emoji_small

Image Credit: Joniah

How to Vectorize the Strawberry in Illustrator
strawberry_emoji_tracing_example

Pirate Concept Sketch

pirate_emoji

Image Credit: Brian

How to Vectorize the Pirate in Illustrator
pirate_emoji

Do these examples make you feel more or less prepared to vectorize your emojis? Why?

Today we will:

  • Continue tracing over our emoji sketches in Adobe Illustrator
  • Create a new blog post with the following:
    • a PDF of our progress so far
    • a few sentences describing what has been easy and what has been challenging about this project

Creating our Vector Emojis in Illustrator

Today’s essential question: How can I use Adobe Illustrator to turn my emoji sketches into vector graphics?

Today we will begin tracing over our emoji sketches in Adobe Illustrator.
We will view a demo at the Smart Board and then follow the steps below:

Part 1: Saving Each Emoji Sketch as an Individual Adobe Photoshop

  1. Open Adobe Photoshop
  2. Open the picture of your sketches
  3. Select the Crop Tool from the toolbar on the left side of the screen. 
  4. Set the size on the at the top of the screen to the following:
  5. Drag the crop tool around your first emoji:
  6. Press enter.
  7. Save your first emoji by naming it file -> save as ->
  8. Open the history palette. Window -> history
  9. Click on the very first line that says “Open.” This will take you back in time to when you have all the emojis visible.
  10. Select the Crop Tool from the toolbar on the left side of the screen. 
  11. Set the size on the at the top of the screen to the following:
  12. Drag the crop tool around your second emoji:
  13. Press enter.
  14. Save your second emoji by naming it file -> save as ->
  15. Repeat until you have saved all emojis as separate files.

Part 2: Tracing over our designs in Adobe Illustrator

  1. Open Adobe Illustrator.
  2. Select “New Print Document” from the pop up screen.
  3. Create a new file in Adobe Illustrator with the following guidelines:
    tshirt_setup_screen_shot
  4. Place your first emoji photo. (File -> place)
  5. Repeat until you have placed all 4 emojis.
  6. Create a new layer by clicking on the “new layer” button at the bottom of the layers palette on the right side of the screen. new_layer_button
  7. Select the pen tool. pen_tool
    Trace over your first shape. (You may need to decrease the opacity of this layer so you can see what you are tracing. You can do this by clicking on the transparency icon transparency_icon on the right side of the screen and decreasing the opacity so it is below 100. transparency_window)
  8. Bring the opacity back 100% and adjust the color if necessary.
  9. Repeat steps 3 and 4 until you are happy with your vector illustration.
  10. Save your Illustrator file, and then save a version as a .pdf
  11. Create a new blog post with the PDF of your progress. I do not expect you to finish your design, but I do expect you to post what you worked on today.

Bonus Skill: Using the Shape Tool in Illustrator

There is a built in shape tool that will draw perfect circles for you. To use this tool, click and hold on the rectangle on the toolbar on the left side of your screen until a drop down menu appears. Select the Ellipse Tool.
circle_tool

You can use this tool to draw any type of oval. If you would like to draw a perfect circle, hold down the shift key while clicking and dragging.

Bonus Skill: Creating Lines in Illustrator

Your emoji design probably has lines in it. You can create lines by drawing very thin shapes like this. This allows you to vary the line weight and add visual interest as shown in the second example. Why is the second example more interesting?
line_comparison.PNG

Today we will:

  • Use Adobe Photoshop to save each emoji sketch as an individual image
  • Begin tracing over our emoji sketches in Adobe Illustrator
  • Create a new blog post with a PDF of our progress so far

Emoji Project Planning: Day 2

artist_emoji.png
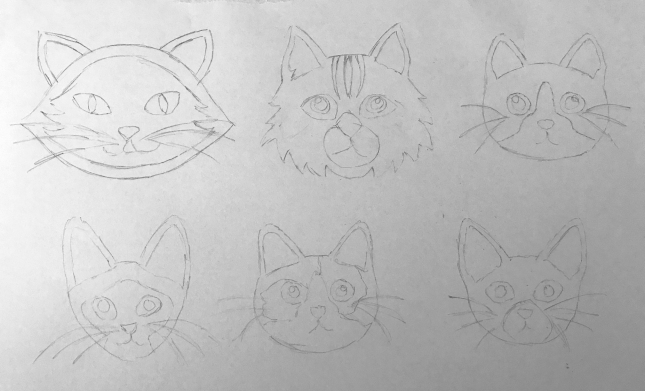
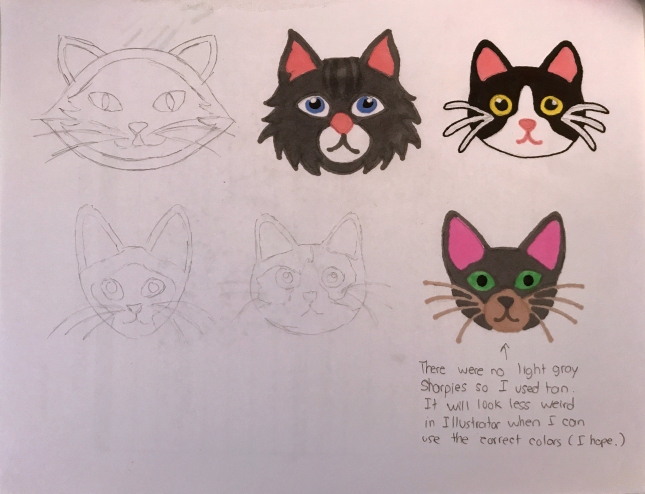
Today we will finish our emoji project planning posts. Remember to sketch a minimum of 6 emojis on separate pieces of paper, color them in with Sharpies, and post photos to your blog. You should also write a paragraph that answers the following questions:

  • What will the theme of your emoji set be?
  • What visual elements will you use tie you set of emojis together?

Make sure you make a new blog post for today instead of editing last class’s post.

Here are some student emoji sketches that are well on their way to success. How has each artist created unity throughout the set?

seth_emoji

Image Credit: Seth

sylena_emoji

Image Credit: Sylena

viviam_emoji

Image Credit: Viviam

bikram_emoji

Image Credit: Bikram

If you finish early, go back and finish your Photography Reflection blog post.

Today we will:

  • Publish a final emoji project planning post. It should contain the following:
    • Sketches of our planned emojis (these should eventually be colored in with Sharpie. If you do not finish your sketch, post a photo of your progress to receive credit.) You’ll have the best results if you draw these large – one sketch per piece of paper.
      • You will be using the pen tool to create the project, so remember to:
        • Keep your sketches simple enough that you feel confident in your ability to trace over them with the pen tool
        • Color your sketches with flat color (no shading). This is why we are using Sharpie.
        • Create at least 6 sample emojis. Ms. Lawson and your classmates will help you select the 4 strongest ones to turn into vector graphics.
    • A paragraph describing your concept
      • What will the theme of your emoji set be?
      • What visual elements will you use tie you set of emojis together?
  • Finish our Photography Reflection  blog post (if we have not done so already)

New Project: Vector Emojis

Today’s essential question: How can I create a unified set of four emojis?

For our next project, we will create a set of 4 emojis in Adobe Illustrator.
Your emojis will show unity both in style and theme.

Example Emoji Sets

Here are some sets of emojis that would fulfill the project requirements.
How has the artist created unity with each emoji set?

pink_dessert_emoji

grumpy_cat

dog-cartoon-vector-design_23-2147493711

free-sports-icons-vector.jpg

vector-candy-and-cake-cute-icons

Avatars1

cute-dog-breeds_23-2147519661

create-and-customize-your-own-emojis-with-makemoji-for-iphone

weather

sport-icons-collection_1284-1891.jpg

sweets-and-candies-icons_23-2147514121

Project Requirements:

  • Unified set of four emojis created in Adobe Illustrator
  • Set of final four images fill a 12×12″ page
  • High-quality craftsmanship
  • Original artwork

We will spend the next two classes sketching out ideas and formulating our project concept for our emoji set. Even though you will have two classes to create the project concept, you must create a different blog post for each day in order to receive participation points. Your finished project planning post counts as a 10-point homework grade and must fulfill the requirements listed below. (If you don’t finish everything today, you can copy and paste today’s blog post into next class’s blog post and then add anything you need to finish it.) Here are examples of thing you might post at the end of today’s class in order to receive credit:

cat_emoji_sketch

My emoji theme will be cats. I will tie the set together by drawing all the cats in a similar cartoon style, and using flat, but realistic colors for the cats. Also, the fact that all the emojis are cat faces will help create unity throughout my set. I don’t think I will use the first face because it doesn’t match the others now that I see them all together.

cat_emoji_marker


Will finish coloring next class. It is hard previewing colors because the Sharpies aren’t the colors I want to use.

If you did not finish your Photography Reflection blog post last class, you may also work on that.
Make sure that regardless of you work on today, you publish a NEW blog post in order to receive participation points for today’s class.

Today We Will:

  • Introduce the Emoji Design Project
  • Create a new blog post with the following:
    • Sketches of our planned emojis (these should eventually be colored in with Sharpie. If you do not finish your sketch, post a photo of your progress to receive credit.) You’ll have the best results if you draw these large – one sketch per piece of paper.
      • You will be using the pen tool to create the project, so remember to:
        • Keep your sketches simple enough that you feel confident in your ability to trace over them with the pen tool
        • Color your sketches with flat color (no shading). This is why we are using Sharpie.
        • Create at least 6 sample emojis. Ms. Lawson and your classmates will help you select the 4 strongest ones to turn into vector graphics.
    • A paragraph describing your concept
      • What will the theme of your emoji set be?
      • What visual elements will you use tie you set of emojis together?


Photography Reflection

dog-and-camera-lovely-8591-2560x1600__880
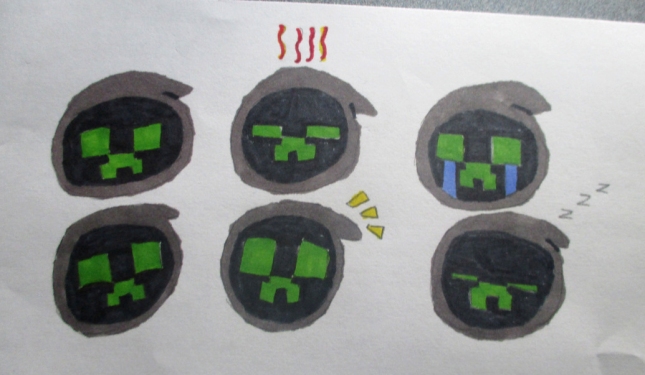
Today’s essential question: How have my photography skills improved over the past few weeks?

Today’s assignment is designed to show your growth as a photographer. First, you will pick a “good” photo you posted to your blog early in the unit, analyze some mistakes you made, and reflect on how you could take a better photo knowing what you know now. Next, you will post your ten best photos from this fall. (These should be the photos with the strongest artistic merit, not technically awful photos selected because they remind you of a funny memory!) Not sure which ones to post? Make a folder with your top 20 and ask classmates for objective feedback. Finally, you will write an artist statement in paragraph form (minimum of 150 words) about this project.

Part 1: Analysis of a Bad Photo You Used to Be Proud of

  • Post a photo taken early in this unit that you used to think was good
  • Write a paragraph
    • describing why you originally liked the photo
    • analyzing which technical aspects of the photo are weak. Some examples include: blurry, crooked, poor lighting, no clear subject matter, poor composition, cliche, awkward objects in the background

Part 2: Post the Best 10 Photos Taken This Fall

  • Put the best 20 in a folder, then ask classmates and Ms. Lawson for feedback on which photos have the most artistic merit
  • Post your 10 best full size photos to your blog

Part 3: Write an Artist Statement (Minimum 150 words) about the Photography Unit

You can use these questions to outline your artist statement, but make sure you turn it into paragraph form.

  • Describe your artwork
    • What do your photos look like?
    • What is the subject matter? Do you find yourself attracted to photographing certain subjects? Why?
  • How did you create your art?
    • What type of camera did you use to take photos? How did this camera affect your artwork?
    • Describe the process or steps you took to create your photos.
  • What is the big idea behind your artwork?
    • Who or what inspired your photos?
    • What are your photos about?
    • How do you want people to feel when they view your photographs?
  • Overall thoughts
    • What did you learn from this photography unit?
    • Is the final collection of photos what you imagined? How so?
    • What did you do well? What could you have done better?

Part 4: Finish Missing/Incomplete Assignments

  • Bad Photos (label which category each photo falls into – ok to edit existing post): Danny, Eric, Ezequiel, Kyneisha, Seth, Sylena
  • Angle of View (label which angle each photo was taken from – ok to edit existing post): Danny, Eric, Ezequiel, Kyneisha, Jaden, Sylena
  • Photographing Line, Shape, Color (label which category each photo falls into – ok to edit existing post): Danny, Brian, Ezequiel, Kyneisha, Jaden, Sylena
  • Vector Practice with the Pen Tool: Danny, Omarion, Jayden, Aquan, Eliejha, Rae’iona, John
  • First Blog Post: Danny (incomplete), Omarion (incomplete), Ezequiel, Aquan, Seth, Jaden

Today we will:

  • Create a reflective blog post on our photography unit that contains the following:
    • A bad photo you used to be proud of, and a paragraph describing its technical weaknesses
    • Your 10 best full size photos taken during this unit
    • An artist statement (minimum 150 words) about the photography unit
  • Finish any incomplete assignments and post them to our blog

Last Photography Day

animals-cozy-with-camera-gear-squirrel__880.jpgToday will be our last day to take photos. Check the progress report in your folder to see which assignments you need to make up. You may also redo assignments to receive a higher grade. If you are all caught up, you will take photos of your choice today. This is your chance to show off the photography skills you have learned over the past five weeks!

Links to past assignments (make sure you follow all the requirements to receive full credit):

Today We Will:

  • Complete any missing photography assignments
  • Create a new blog post for each missing assignment that follows all requirements
  • If we are all caught up, take high quality photos of our choice and post them to our blog

Photo Assignment #8: Black & White Lighting

Today’s essential question: How can I use natural light to take great photos?

Today we will take photos with great lighting during the first half of class. During the second half of class, we will convert our photos to black and white. We will post both the original color photos and the black and white version to our blogs today.

Here are some photos taken by SOTA students that make great use of lighting:

Photography Lighting Tips

  • Go outside. The sun is a more even, flattering source of light than anything you can find inside.
  • Avoid harsh sunlight. Cloudy days are better for taking photos, because the clouds diffuse the sunlight, softening both the light itself and the shadows it creates. For the same reasons, it is better to photograph in the morning or evening instead of high noon.
  • Diffuse harsh light with position and location. We can’t control the weather, but we can work around it. If the lighting is particular harsh, move your subject to a shady spot, such as under a tree or against a building. Check to make sure there aren’t any harsh shadows being cast. Also, try walking around your subject or having them face different directions. The lighting can dramatically change depending on the direction you face.
  • Hold still. If you are working with limited light, the shutter will remain open longer to properly light the photo. If you (or your subject) move during this time, the photo will be blurry.
  • Avoid flash. It will over-expose the light areas and under-expose the dark parts of your photo, and you won’t be able to correct it in Photoshop.
  • Shoot with the sun to your back or side. Shooting facing the sun will cause the same issues as your camera’s built in flash – it will over-expose the light areas and under-expose the dark parts of your photo, and you won’t be able to correct it in Photoshop.

How to convert your photos to black & white:

  1. Open Photoshop from the Start Menu at the bottom of the screen.
  2. Image -> Mode -> Gray scale
  3. Image -> Adjustments -> Levels
  4. Look at the image that pops up. If your image has sufficient contrast, the “mountain range” will extend to the edge of the window.
    If your image looks similar to this, you do not need to adjust the levels, and can close out of the window:

    levels_no_adjustment

    If your “mountain range” of values does not extend to the edges of the window (such as the example below), you will click on the left cursor and drag it to the beginning of the left side of the mountain.
    You will then click on the right cursor and drag it to the beginning of the right side of the mountain.
    You will be able to preview what you are doing as long as the “preview” box is checked.

    levels_before_and_after

    5. When you have adjusted your levels, click ok.

    6. Save the black and white version of your image. (File -> Save as.)
    Do not replace the color version, as you will need to post both to your blog!

Today we will:

  • Take photos with great lighting during the first half of class
  • Convert the photos to black and white
  • Create a new blog post with the following:
    • BOTH versions (black and white and color) of the photos you took today
    • A paragraph answering the following questions:
      • What did you learn about photography and lighting today?
      • What (if anything) will you change about the way you take photos in the future to ensure quality lighting?
      • Do you prefer your photos in black and white or color? Why?