Vector Landscape: Last Day

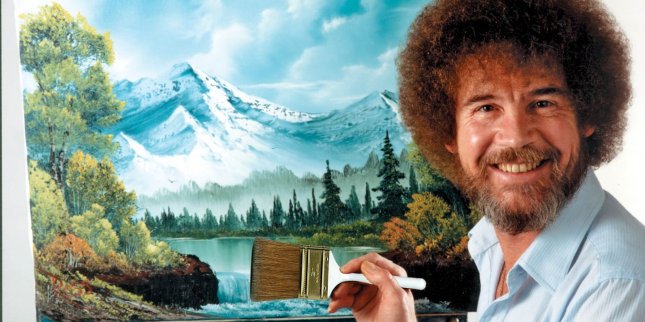
bobross-toc.jpg

Today’s essential question: What should I add or change to finish my vector landscape?

Today we will finish our vector landscapes. If you think you are finished with your project (or don’t know what else to add), call Ms. Lawson over. Once she approves your finished landscape, you should make a final blog post with the following:

  • PDF of finished landscape (looks like a link)
  • PNG of finished landscape (looks like an image)
  • 150 word artist statement, in paragraph form, about your landscape
Today we will:

  • Finish our vector landscapes
  • Create a final blog post with the following:
    • PDF of finished landscape (looks like a link)
    • PNG of finished landscape (looks like an image)
    • 150 word artist statement, in paragraph form, about your landscape

Creating a Realistic Value Scale

Today’s essential question: How can I create realistic value scales in Illustrator?

brown_value_scale

At this point in the project, you should have most of your shapes traced. You may notice that some of your highlights or shadows look a bit off. In order to create a realistic scene, you will want to create a value scale like the one above, and then use the eyedropper tool to adjust the colors accordingly. Steps on how to do this can be found in this blog post.

11th Grade Progress

Here is where some of my 11th grade students are on their landscape designs.
What is working well?
What could be improved?
What ideas do these projects give you for your own landscape?

Finishing Up

Friday will be the last day for this project. If you think you are finished with your project (or don’t know what else to add), call Ms. Lawson over. Once she approves your finished landscape, you should make a final blog post with the following:

  • PDF of finished landscape (looks like a link)
  • PNG of finished landscape (looks like an image)
  • 150 word artist statement, in paragraph form, about your landscape

Missing Large T-Shirt Images

The following people need to post the finished tshirt designs as FULL SIZE images to their blogs. Call Ms. Lawson over if you need help:

  • Amber
  • Mahala
  • Harry

Today we will:

  • Continue working on our vector landscapes
  • If you have not done so already, create value scales for any major items in your scene
  • Use the value scales to adjust the colors in your landscape
  • Post both a PDF and PNG of our progress to our blogs

Adding Shadows, Highlights, and Other Details in Illustrator

Today’s essential question: How can I create highlights and shadows with the pen tool in Illustrator?

Sometimes when you see a vector image, it’s difficult to figure out how the artist created the intricate shadows, highlights, and textures. Try to determine how the details were achieved in the illustrations below:
will_run_for_dessert_aqua

Now let’s break down the frosting on the cupcake.

I started with an outline of the shape of the frosting in a mid-tone:
frosting_midtone

Then I added a layer with several highlight shapes:
frosting_highlight

Followed by a layer with several shadow shapes:
frosting_shadow

Here is the frosting with 4 layers representing four shades of shadows and highlights:
frosting_combined_layers

The cupcake wrapper was created the same way:
vector_cupcake

Today we will:

  • Continue tracing over our sketches in Illustrator, creating shapes to add highlights and shadows
  • Create a new blog post with the following:
    • a PDF of our progress – looks like a link
      (File -> Save As -> Select “PDF” from the drop down menu)
    • a PNG of our progress – looks like an image
      (File -> Export As -> Select “PNG” from the drop down menu)
    • a few sentences describing what you worked on today, any challenges you faced, and anything you would like help with

In Process Critique

critique-meter-with-different-emotions.jpg

Today’s essential question: What can I add or change about my project to make sure it fulfills all requirements?

Today we will critique our vector landscape projects so far with assigned groups. You will check to see how well the project follows each of the guidelines listed below, and answer the questions below about the feedback you received on YOUR project in a new blog post.

In Process Critique Questions:

How well does the project fulfill the criteria below?
What needs to be added or changed to improve the project?

  • Depth created through overlap and scale
  • Shows clear background, middle ground, and foreground
  • Color scheme utilizes aerial perspective
  • Sufficient detail creates a visually interesting design

Groups

  • Boone, Troy, Harry, Han
  • Stella, Mahala, Genevieve, Tianna
  • Ashanti, Amber, Treasure, Poe
  • Akirah, Anastacia, Maria, Gianna, Gretchen

Today we will:

  • Critique our vector landscape projects so far with our assigned groups. Write the feedback in a new blog post. You will reference this feedback as you continue to work on your landscape.
  • Continue working on our vector landscape projects, incorporating any feedback we received during today’s in progress critique
  • Upload both the PSD and PNG of our progress to our Google Drives
  • Create a new blog post with the following:
    • a PNG of our progress
    • the feedback you received during today’s peer critique
    • what you worked on during today’s class, and what you still need to do to finish your project

Vector Landscape Day 6: Aerial Perspective

Today’s essential question: How can I incorporate aerial perspective into my vector landscape?

Aerial perspective or atmospheric perspective refers to the effect the atmosphere has on the appearance of an object as it is viewed from a distance. As the distance between an object and a viewer increases, the contrast between the object and its background decreases, and the contrast of any markings or details within the object also decreases. The colors of the object also become less saturated and shift towards the background color, which is usually blue, but under some conditions may be some other color (for example, at sunrise or sunset distant colors may shift towards red).

Here are some examples of aerial perspective:

Today we will:

  • Continue tracing over our sketches in Illustrator
  • Create a new blog post with the following:
    • a PDF of our progress – looks like a link
      (File -> Save As -> Select “PDF” from the drop down menu)
    • a PNG of our progress – looks like an image
      (File -> Export As -> Select “PNG” from the drop down menu)
    • a few sentences describing what you worked on today, any challenges you faced, and anything you would like help with

Vector Landscape #5: Adding details to the foreground

Today’s essential question: How can the use of detail make an object appear closer to the viewer?

Today We Will:

  • Continue tracing over our sketches in Illustrator, adding more details to the objects in the foreground to make them appear closer to the viewer
  • Use the tools in Illustrator to simplify the process and save time
  • Create a new blog post with the following:
    • a PDF of our progress – looks like a link
      (File -> Save As -> Select “PDF” from the drop down menu)
    • a PNG of our progress – looks like an image
      (File -> Export As -> Select “PNG” from the drop down menu)
    • a few sentences describing what you worked on today, any challenges you faced, and anything you would like help with

Vector Landscape Day 4: Creating Depth Through Background, Middle Ground, & Foreground

Today’s essential question: How can I create depth through overlap and the use of a clear background, middle ground, and foreground?

Student Progress

How do the student sketches below create depth?

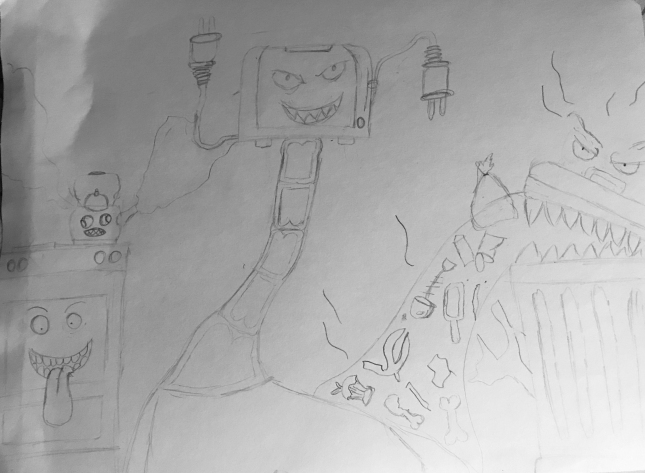
Anastacia has a great concept but her sketch lacks depth. What could she add to create the illusion of a clear background, middle ground, and foreground?

anastacia_landscape.jpg

Today We Will:

  • Continue tracing over our sketches in Illustrator, adding to the middle ground and background to create overlap and depth if needed.
  • Use the tools in Illustrator to simplify the process and save time
  • Create a new blog post with the following:
    • a PDF of our progress – looks like a link
      (File -> Save As -> Select “PDF” from the drop down menu)
    • a PNG of our progress – looks like an image
      (File -> Export As -> Select “PNG” from the drop down menu)
    • a few sentences describing what you worked on today, any challenges you faced, and anything you would like help with

Vector Landscape Day 3: Adjusting an existing path in Illustrator

Today’s essential question: How can I use the direct selection and curvature tools in Illustrator to adjust an existing path and avoid redrawing it?

Adjusting an existing path

Direct Selection Tool (white arrow)

Use the direct selection tool white_Arrow to select and move individual points on a path.
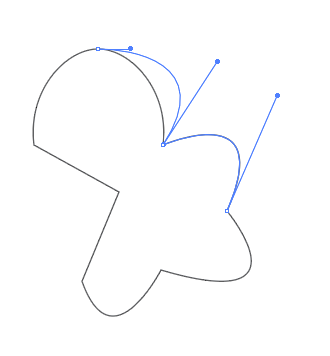
If you are not getting enough control with the mouse, the arrow keys on the keyboard will move points one pixel at a time.

You can also adjust the tangent handles using the direct selection tool.
adjusting_w_white_arrow

Curvature Tool

The curvature tool curvature_tool is another tool that allows you to adjust an existing path.
You can use it to click and drag points and adjust curves:
adjusting_w_curvature_tool

Rulers and Guides

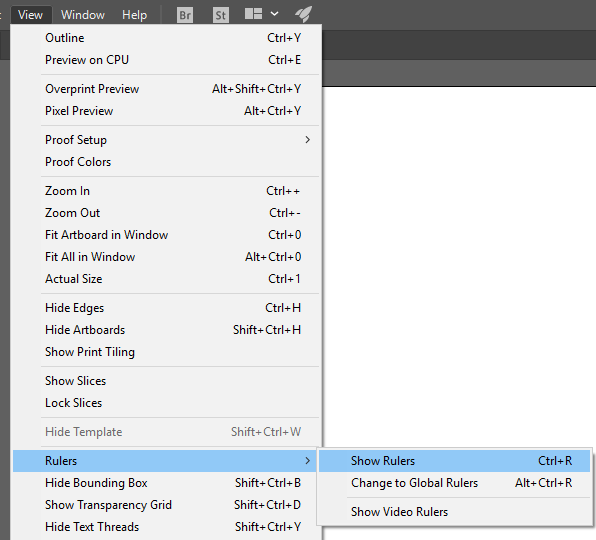
Select View -> Rulers -> Show Rulers to make rulers visible

view_show_rulers

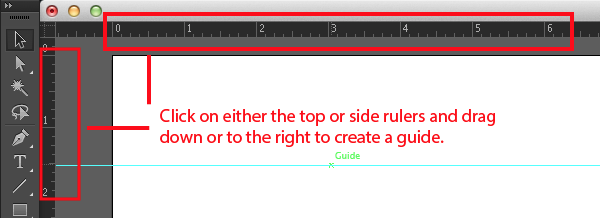
To create a guide, click on either the top or side ruler and drag down or to the right:
guide.png

Managing Guides
  • To temporarily hide guides, select View -> Guides -> Hide Guides
  • To lock guides so you do not accidentally move them, select View -> Guides -> Lock Guides
  • To permanently delete guides, select View -> Guides -> Clear Guides

Today We Will:

  • Continue tracing over our sketches in Illustrator
  • Use the tools in Illustrator to simplify the process and save time
  • Create a new blog post with the following:
    • a PDF of our progress – looks like a link
      (File -> Save As -> Select “PDF” from the drop down menu)
    • a PNG of our progress – looks like an image
      (File -> Export As -> Select “PNG” from the drop down menu)
    • a few sentences describing what you worked on today, any challenges you faced, and anything you would like help with