
Today we will set up our Google Drives and blogs. By the end of this class you should:
- set up your class blog
- email Ms. Lawson the link to your class blog from your school Gmail account
- publish your first blog post
Part 1: Setting up a WordPress account
If you have a WordPress account from last year, skip to Part 2.
- Click here to set up a WordPress account. (This will be your Foundations 2 class blog.) You may choose any free template you like, but keep in mind that you will need to post both text and images, so you should pick a template that supports both of these requirements well. Use your real email address – you will have to verify your email in order to publish blog posts.
- Log into your email account, open the email from WordPress, and click on the link to verify your email address.
Part 2: Logging into your district Gmail account
- Click here to log into your district Gmail account. Your username will be your student ID # @rcsd121.org.) Ex. 8123456@rcsd121.org, and your password is your district computer password. (Your district gmail account has unlimited storage space and will give you access to DropBox, which is a great free way to back up your files.)
- Email Ms. Lawson (2013045 at rcsd121.org) from your district Gmail account. You will not receive credit if you email me from another email client. Your email should include:
- Your first and last name
- A link to your WordPress blog. For example, “Stephanie Lawson – My blog URL is SOTAfoundations2.wordpress.com.”
Part 3: Publishing your first blog post
Publish your first post by clicking on this icon at the top of your WordPress screen 
Include the following:
- Post an image by following these steps:
- Go to images.google.com
- type in what you are looking for (ex. “cutest kitten in the world”)
- click on the image you want to download
- control +click -> save images as
- save the image to your desktop
- Click on the “add media” button

- Click on “upload files”

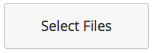
- Click on “select file”
- Select the image you want to insert
- Write a paragraph with the answers to the following questions:
1. Describe your previous experience with computer art.
2. What are 5 of your current favorite songs that could be played in class?
3. Whose is responsible if the computer crashes and your project disappears? What will happen?
4. How will you back up your work?
5. When is food allowed in the classroom?
6. List the circumstance under which I may refuse to offer you extra help:
7. List some easy ways to gain participation points:
8. List some easy ways to lose participation points: - Click “publish” at the bottom of the screen to publish your post.


If you have time, set up the “About” page on your blog.
Need help? Please follow the following process:
- Check the blog
- Ask two classmates
- Still stuck? Raise your hand and Ms. Lawson will help you as soon as she is available.
If you finish early, help your classmates set up their blogs or finish the social media handout.
Welcome again! We are going to have so much fun.
